Install Linux on VirtualBox (2012)
This page is a guide on installing Linux on a Windows machine using Oracle VM VirtualBox. This guide is written for programers and sys admins.
Instruction on this page is based on VirtualBox v4.1.22r80657 (as of ). The Linux is Ubuntu 12.04. Later VB version or different Linux should work similarly.
VirtualBox is truely a great tool. You can use it to run Linux and Windows at the same time, without needing to duel-boot. You can play with Linuxes experimentally. For example, try different Linux desktops, stress test kernel features, install random software. If anything went wrong, you can simply delete that setting and start a new one. It's also great for testing software, reproduce bugs.
Download Ubuntu Linux Disk Image
• Download Ubuntu Linux as disk image. For example, “ubuntu-12.04.1-desktop-i386.iso”. Download at http://www.ubuntu.com/download. Choose the Ubuntu Desktop or Ubuntu Server, not the wubi Windows installer. You'll need this Linux disk image to install Linux on the virtual machine.
Download Oracle VM VirtualBox
• Download Oracle VM VirtualBox at https://www.virtualbox.org/ .
Follow the graphical user interface to install a guest OS, to begin playing. Just use default for everything.
For serious use, practically speaking, you will eventually have tried several installs of guest OSes. You can easily create new guest OS and also remove them completely. So, no harm in playing with it first. I assume you have done this at least once.
I also recommend reading the documentation, chapters 1 “First steps” to 4 “Guest Additions”. It is in the Help menu.
This guide gives you a stream-lined steps of installation and tech detail for serious use.
Create a New Guest OS
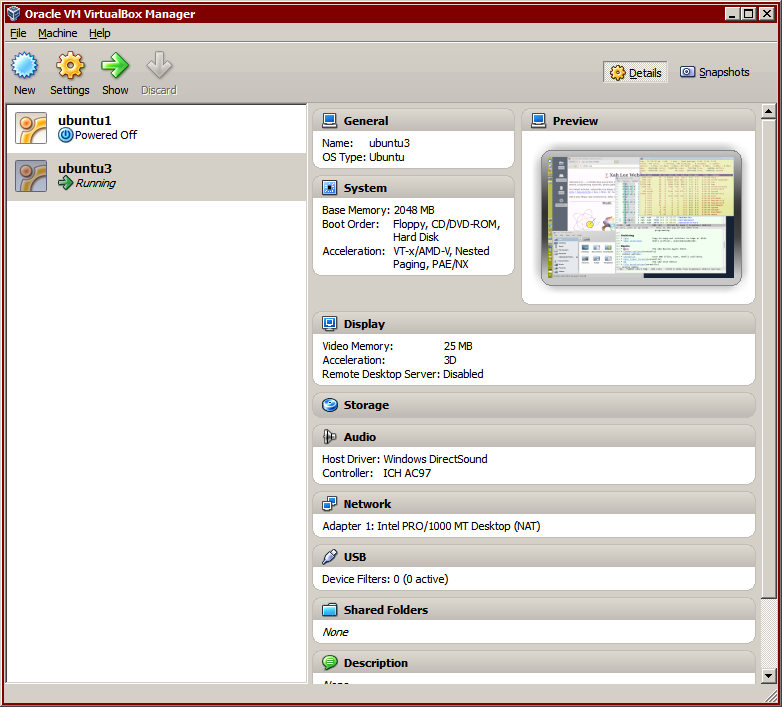
• Now, create a new Guest OS. (click the “New” icon in VB Manager)
In hard-disk setting, chose either dynamically allocated or fixed, but be sure it's large enough that you won't reach the limit, because re-sizing it later is a major pain or impossible. The dynamically allocated will grow as needed, but doesn't work if you need to install a large chunk of stuff at once (e.g. OS upgrade, importing database). The default 8G is too small. Try 24G or more.
You CANNOT change disk size later. So, choose good size now. (you can, actually, but it's not practical.)
In RAM setting, choose a larger amount than the default 512MB. If you have 8G RAM, give it 2G. (RAM settings can be changed later, in settings, so no worry) RAM given to guest OS won't be available for host OS when the guest OS is running. So, don't be greedy.
Start Guest OS, Update Linux Software
• While the guest Linux is running, first thing is to update it.
You can launch the GUI Update Manager by sudo update-manager, or in terminal type:
# updating Linux software
sudo apt-get update
sudo apt-get upgrade
sudo apt-get dist-upgrade
On Ubuntu 12.04 default, press Ctrl+Alt+t to start a terminal.
• Install Linux built tools sudo apt-get install build-essential. This is essential for programer or sys admin.
• Reboot. sudo shutdown -r 0.
Install VirtualBox Guest Additions
Guest Additions lets you have shared clipboard (for copy/paste), and large Guest OS screen, and shared folders (i.e. let Guest OS read/write files on your host OS.)
Guest Additions is basically a module that runs in Guest OS.
In Guest OS, terminal:
sudo apt-get install dkms.
This installs dkms (Dynamic Kernel Modules Support).
This is required for the ability to have large screen size for guest OS (as a large window inside host OS).
For shared clipboard, if you don't have dkms installed, then every time the kernel update or VB update, the guest addition will stop working.
Then, in the menu on top of guest OS's window, pull menu [Devices ▸ Install Guest Additions…]. Then, a auto-run will pop-up. Run it.
If you forgot to install the dkms before you installed Guest Additions, no worry. Install dkms, then in Guest OS terminal type.
sudo /etc/init.d/vboxadd setup.
Then, reboot Guest OS (sudo shutdown -r 0).
Then, in Guest OS, open the CD then click the file “autorun.sh”, or in terminal type
sudo /media/VBOXADDITIONS_4.1.22_80657/autorun.sh.
Activate Shared Clipboard
To activate shared clipboard: in VB Manager, select VM machine by clicking its icon , then click the Settings icon (below the menu bar), then select General tab on left, then the tab “Advanced”, “Shared Clipboard” box, set it to Bidirectional. (you might have to stop Guest OS first.)
You can test copy/paste to/from guest/host.
Large Virtual Machine Display
After you have installed guest additions, you can now drag the guest OS window to enlarge its screen. You can also choose full-screen in the menu [View] (the menu above VM window).
Shared Folders
Shared Folders is very useful. It lets you access the files in Microsoft Windows from VirtualBox's guest OS.
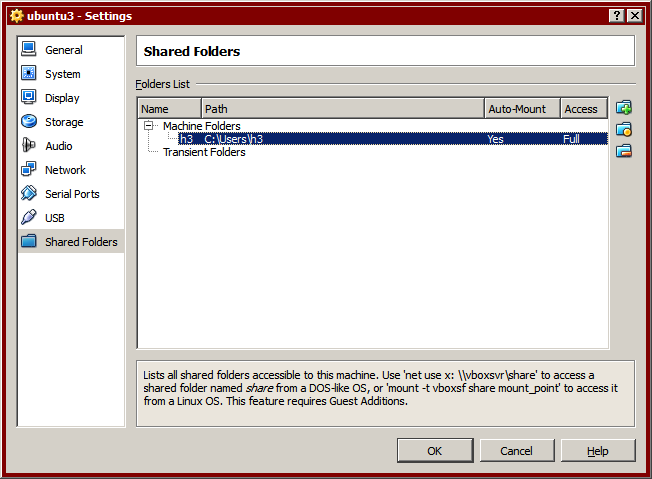
To turn on shared folders, first shutdown your guest OS. Then, in VB Manager, select VM machine by clicking its icon, then click the Settings icon (below the menu bar), then select “Shared Folders” tab on left, then click the folder+ icon on top right to add, then choose a folder from host machine. You can also select automount. Then, start your guest OS.
This from the manual:
There are two types of shares:
• VM shares which are only available to the VM for which they have been defined;
• transient VM shares, which can be added and removed at runtime and do not persist after a VM has stopped …
In Guest OS, you can mount the folder by mount -t vboxsf ‹sharename› ‹mount point›.
If you have auto-mount on, then the folder appears in
/media/name
# /media

drwxrwx--- 1 root vboxsf 28672 Oct 10 21:54 sf_h3
The folder is owned by “root” and group “vboxsf”. You need to add yourself to the vboxsf group to access the folder. Do sudo usermod -G -a vboxsf ‹your login name›, then logout and log back in.
Go on to Linux Setup
That should be it. Now you can go on to customize your Linux, and install Linux software, such as {mysql, php, ruby, python, svn, git, …}. If you are not familiar with Linux, you might look at my own setup, see: Xah Linux Setup .